自从 JA2 1.13 源码迁移到 Github 后,各位 Moder 们就在讨论编译方式优化,以前是要给不同版本的 Visual Studio 添加 MSBuild 文件的,比较麻烦,而且大部分铁血玩家都是不懂编程的,所以编译遇到问题是只能等人解决~
git 760f8ab 版本删除了所有 MSbuild 文件,统一使用 CMake 的 MSBuild 生成器。
JA2 1.13 Source Git 地址
https://github.com/1dot13/source
新的编译方法其实在这个页面已写了方法步骤,英文原文:
Visual Studio setup
- Run
Visual Studio 2019or newer.- Clone and open the location with the source code using one of these two options:
- Click
Clone a repository
- Enter
git@github.com:1dot13/source.gitorhttps://github.com/1dot13/source.gitin the Repository location field, select the path you want to clone the repository to and clickClone.- Double-click on
Folder Viewin theSolution Explorer- Click
Open a local folder
- Use this option if you already cloned the repository yourself.
- Visual Studio will automatically detect the CMake configuration files and will run the CMake generation. There will bet a CMake error in the logs saying
No existing preset was found, copied a preset template to [some_path]. This is normal and only happens once.- Click on the dropdown that says
x64-Debugand selectManage configurations.... This should trigger Visual Studio to load theCMakeUserPresets.jsonfile it just copied. Now you can close the window for managing the configurations.- The
x64-Debugoption should have been replaced by1dot13 Debug. Click it and selectManage configurations...again. Here is where you configure the language for the built executables as well as which ones to build, Most important, here is where you setCMAKE_RUNTIME_OUTPUT_DIRECTORYto the path to your JA2 1.13 installation. This will be used for debugging. Note that the path needs to have a working 1.13 installation, and that includes the 1.13 game data.- You can use
Build -> Build Allto build the executables you selected in the configuration.
我用 ChatGPT 翻译一下:一般按照说明就能搞定
Visual Studio设置
- 运行
Visual Studio 2019或更新版本。- 使用以下两个选项之一克隆并打开源代码位置:
- 点击“
克隆存储库”
- 在“
存储库位置”字段中输入git@github.com:1dot13/source.git或https://github.com/1dot13/source.git,选择要克隆存储库的路径,然后单击“克隆”。- 在
解决方案资源管理器中双击文件夹视图- 点击“
打开本地文件夹”
- 如果您已经自己克隆了存储库,请使用此选项。
- Visual Studio将自动检测CMake配置文件,并运行CMake生成。日志中会出现一个CMake错误,
指示未找到现有预设,并将预设模板复制到[some_path]。这是正常情况,只会发生一次。- 单击下拉菜单上显示为x64-Debug的选项,并选择“
管理配置...”。这应该触发Visual Studio加载刚刚复制的CMakeUserPresets.json文件。现在可以关闭窗口以管理配置。x64-Debug选项应该已被替换为1dot13 Debug。单击它并再次选择“管理配置...”。在这里,您可以为构建可执行文件配置语言以及要构建哪些可执行文件。最重要的是,在此处设置CMAKE_RUNTIME_OUTPUT_DIRECTORY为JA2 1.13安装路径。这将用于调试。请注意,该路径需要具有可工作的1.13安装程序,包括1.13游戏数据。- 您可以使用“生成”->“全部生成”来构建您在配置中选择的可执行文件。
分割线 》》》》》》》》》》》》》》》》》》》》》》》》》》》》》》
考虑到伸手党的深厚功力,我就尽量重新整理文本 + 截个图说明一下吧,作为资深老铁友尽力了……
0. 如何拉取 git 资源自行搜索学习
1. 把 https://github.com/1dot13/source 仓库拉取到一个目录,如 D:/ja2v113-source-git
2. 运行 Visual Studio 2019 或更新版本(我的是 Visual Studio 2019)
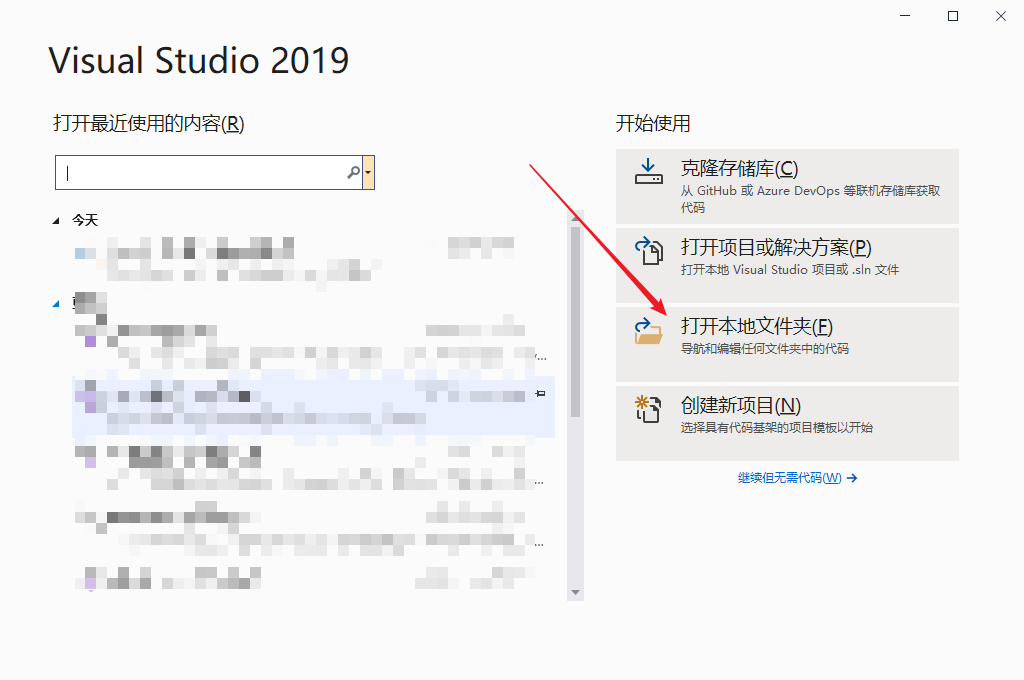
3. (看图)点击“打开本地文件夹”,选 D:/ja2v113-source-git,等 Visual Studio 读取完代码
4. (看图)等看到下面界面,说明就是代码读取完毕,那么接下来点击上面红框的 x64-Debug,会出现下拉菜单,点“管理配置”
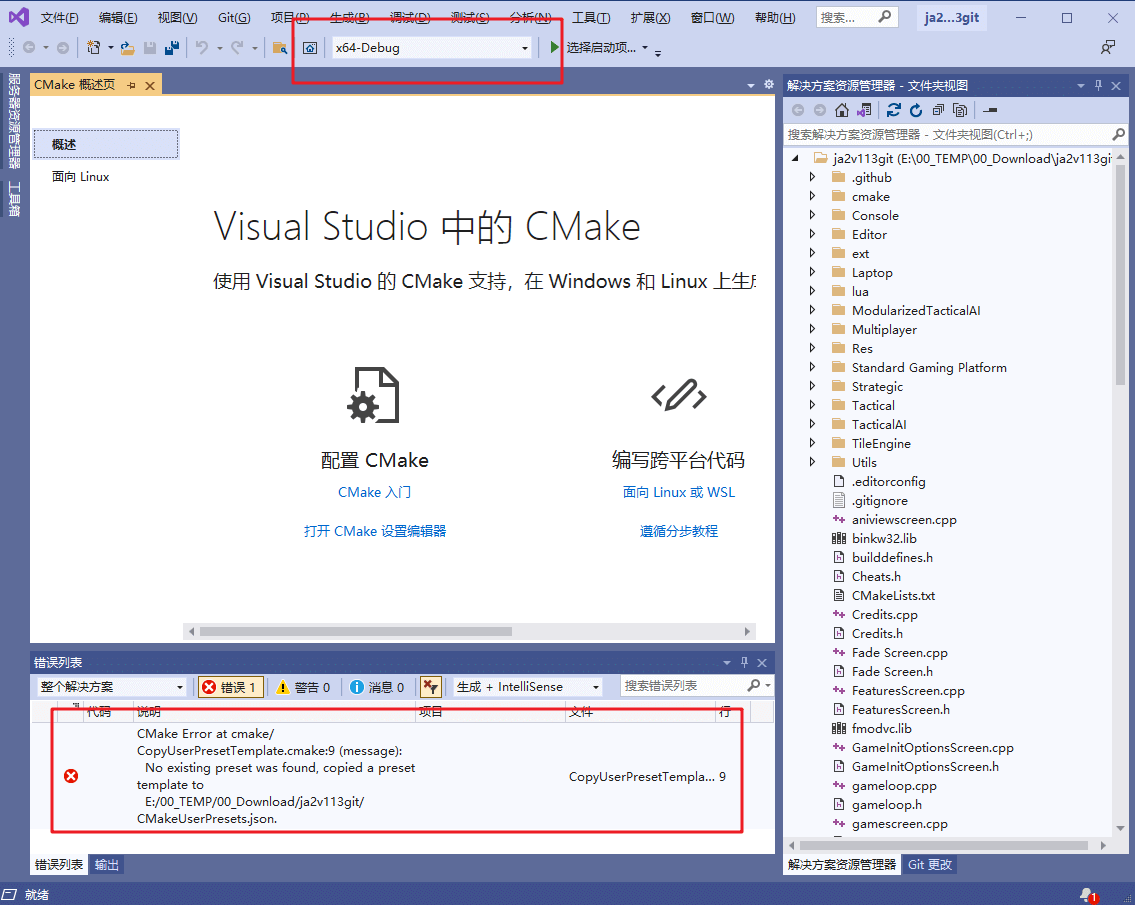
5. 等待自动处理,直到出现下面截图:注意红框,然后点击箭头所指 x 关掉
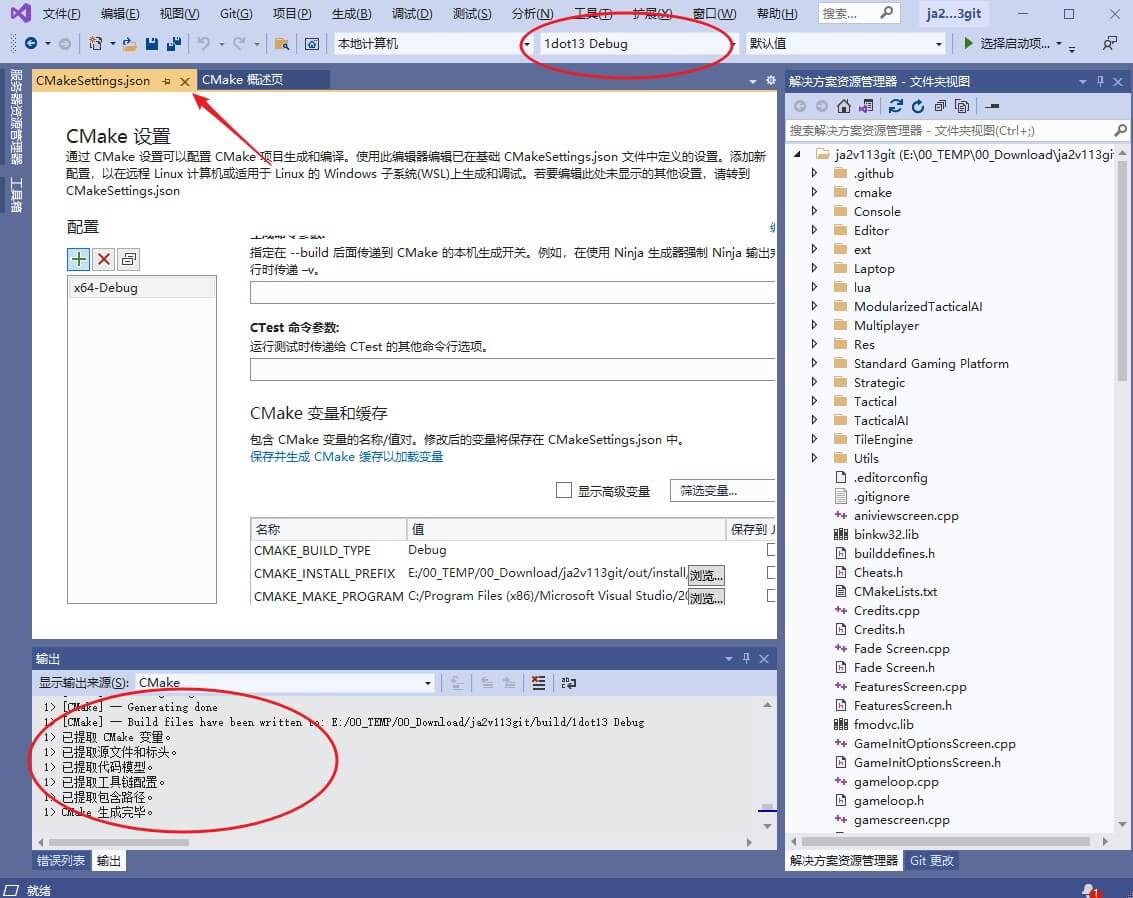
6. 然后点击上图‘椭圆框’的 1dot13 Debug,出现下拉菜单选 1dot13 Release,等待程序读取和处理。
7. 等输出提示“CMake 生成完毕。”后,再次点击 1dot13 Release 出现下拉菜单,选“管理配置”出现 CmakeUserPresets.json 编辑状态

8. 根据上图的红箭头改成 CHINESE 就会编译中文版,蓝箭头双引号里面填写 1.13 游戏所在目录,例如你的 1.13 游戏放在 D:/ja2,就填 D:/ja2(编译成功的 JA2_CHINESE.exe 会在这个目录里面)。
9. 那么最后就是点菜单“生成 》全部生成”。
时光飞逝,“无折腾不铁血”已经不是很适合我了,但偶尔怀旧玩玩老游戏还是很不错的。


- 本文标题:给铁友:JA2 1.13 Source 新的编译方法
- 本文链接:https://zww.me/ja2player-ja2-source-complile-method.z-turn
- 发布时间:2023年05月26日 19:51
- 版权声明:除非注明,文章均为 zwwooooo 原创,转载请以链接形式标明本文地址!
逛熊窝的时候找到git了,但是懒得搞,下了别人编好的
话说iov还有人维护吗?想找来看看,但是好像教授在新的molle功能出之前就弃坑了?
叫兽早弃坑了,有人整理兼容现在的版本,前段时间记得 kmoi 整理了,具体我没玩。你可以进群,群号我发你邮箱。
大佬有群号给我发个呗
@sander 已发你邮箱。
现在1.13最新稳定build是什么啊?
@spartan1096 可以去熊窝的github: https://github.com/1dot13/source/releases